My Top 5 Heirloom Melons (of 2013)

This winter, when I received seed catalogs in the mail, I immediately turned to the Melon pages.  After years of struggling to grow melons in conditions that simply were not suitable – partial sun, cool nights – I was determined to grow a few delicious heirloom melons in my tiny garden.

Baker Creed Heirloom Seeds, based in Missouri, has the most incredible selection of melons I have ever seen.  It was incredibly difficult to select only a few, and I ended up with a dozen or so varieties.  Sadly, some of my starts didn’t transplant well, but I was still left with an assortment of eight varieties, of which we are still harvesting several!  Here are my favorites:

Melons3

Banana Melon – Looks like a banana, tastes (faintly) like a banana.  A sweet, unique melon that I really enjoyed.  Fun to share with friends because it’s such an interesting shape and color!

Melons2

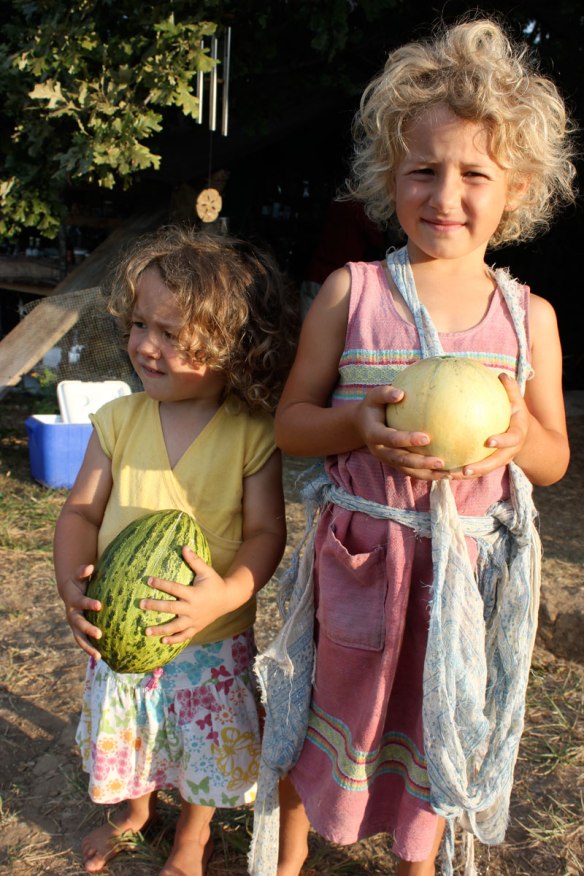
Prescott Fond Blanc – When this melon began taking shape in my garden, I thought I had misplanted a winter squash. Its bumpy, warty appearance and squat shape are very un-melon, but the flavor is rich and sweet.  The photo above does not do this melon justice, as I picked it a bit too early.

Melons4

Ananas – A white fleshed melon that is SO sweet and juicy. This melon was Brian’s favorite.

Melons5

Piel de Sapo – (In Everett’s arms) We enjoyed this variety in Oregon, purchasing it from the local natural food store.  It is a late ripening melon – today we harvested the first of the four fruits on our vine.

Melons6

Charentais – A French melon.  Small, extremely fragrant, and sweet.  We cut one of these open this morning and ate it before breakfast, with no leftovers.

Did you grow melons this year?  I’d love to hear of your favorite varieties. I’m making a wish list for 2014!

Shared with From the Farm Blog Hop and Homestead Bloggers Network.

Out the Front Door :: Melons

Snapshots and snippets of the beautiful, crazy world right out our front door.
If you’d like to share some of your own photos or a blog post,
please leave a link in the comments!

Melons1

Everett holds our first Prescott Fond Blanc Melon (above and below)

Melons2 Melons3

Banana melon really does look and taste like a banana! 

Do you grow melons?  If so, you probably can relate to the absolute wonder of walking out into your garden, picking a ripe melon, and letting its warm, sweet juice drip down your chin and fingers.

My garden in Oregon did not get full sun exposure because we lived in a narrow valley.  Plus, a year-round creek flowed through our backyard, making the garden micro-climate a bit cooler than our neighbors up the hill.  Melons and other hot weather crops were a real challenge to grow.  I was able to grow extremely small, short season cantaloupe in the greenhouse, which were certainly delicious, but not abundant.

I was so excited to try a variety of heirloom melons this summer.  The hot days and moderate nights, humidity, and full sun make for great melon growing conditions.  I selected over a dozen varieties from Baker Creek Heirloom Seeds, and off they grew.

Selecting a ripe melon is still not something I excel at (for instance, the Prescott Fond Blanc above was a tad bit underripe), but my general understanding is that a ripe melon should be fragrant, the base should have a little “give” when pressed with your fingers, and the melon should slip easily from the vine.  The Banana melon grew to its enormous size within the first month, then sat there, unchanging for weeks, while I wondered when in the world it would be ripe. Suddenly, the color began to change from a light green to a light yellow, and finally to a bright yellow. The stem began to separate from the fruit, and a heavenly scent was noticeable.  In two days, it was ready to pick!

Next year, one of my goals is to create a larger space dedicated to melons.  I am hooked!

********************

What is happening out your front door?  Do share below!

Planting a Fall Garden

When the temperatures are in the high 80’s, it’s hard to think about a fall garden.  After all the work that goes into planting, tending, harvesting, and preserving the summer garden, do I really want to do it all over again?

For me, the answer is always yes.  Living in Zone 5b, I am really able to get three plantings in per year: in early spring, summer, and fall.  Fall crops tend to be of the green variety – lettuce, spinach, chard, kale, broccoli, cabbage – and the root variety – beets, carrots, radish, parsnips.  But in truth, I just re-sowed zucchini to see what would happen!  After all, the average first frost date is not until October 10th.

zucchini

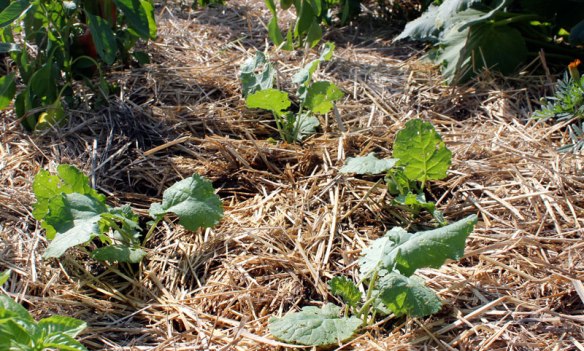
A new zucchini planting, with dill, chard, and cilantro behind.

When we arrived in Missouri in late October last year, I quickly realized that I was not going to be able to get the fresh, local, organic, and year-round produce that I had grown accustomed to the in Willamette Valley of Oregon.  I hastily made a round of phone calls to local farmers, but was told that their season was pretty much over, and if I wanted to come buy some turnips, I was welcome (in retrospect, I should have bought up those turnips!)

This year, I know my garden will not feed us all winter long – it is too small, and the sheet mulched beds are not the best for root crops. Still, I have been busily and carefully sowing, tending, and planting in every little open spot that I have available.

FallCrops4 FallCrops3

Tucking kale into beds.  I planted Siberian and Red Russian, mainly.

FallCrops8 FallCrops5

Just for fun, a few rows of beets and carrots in a particularly well composted raised bed.  Our family, particularly the two little ones, LOVES beets, so I hope they do well!

FallCrops7

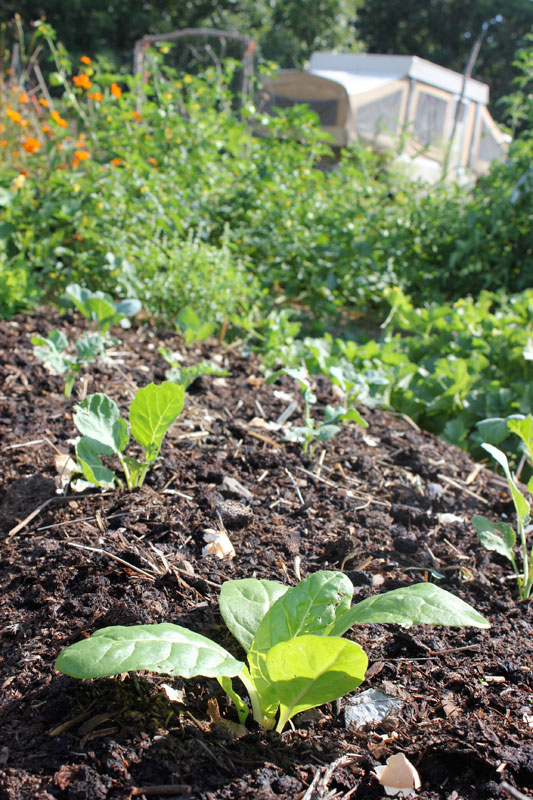
A bed of brassicas and chard, with lettuce and mesclun mix sown in between.  I have been challenged by cabbage moths, so I’m trying various deterrents, including these crushed up eggshells.

FallCrops2

Prepping new bed space.  We are fortunate to have an unlimited supply of composted horse manure, so I’ve been adding heaping piles, then topping it with a chicken manure fertilizer, and mulching with straw.  I’m going to try to fit a few cabbages into these spots, in hopes that they will be able to inhabit space as the tomatoes and peppers die back.

It truly is a joy for me to spend these hours in the garden, preparing the beds for the coming cool weather.  And it’s also a joy to support the local farmers in my area, from whom I will probably buy a stock of beets, winter squash, carrots, and yes, turnips.

Are you planting a fall garden?  What do you have growing?

In the Garden: Trellises

When you have a small garden, as I do right now, one great way to use space efficiently is to think vertically.  Trellises can be a wonderful tool in your garden – allowing plants to climb up, instead of trailing along the ground.

In my garden, I like to trellis not only climbing plants like peas and pole beans, but also my cucumbers and indeterminate tomato varieties. I like that trellises are not only functional – for instance, preventing disease by maximizing air flow, keeping fruits off the dirt and closer to eye level for easier harvesting, and raising fruits and vegetables away from ground-dwelling insects – but they are also beautiful, creating three dimensional interest in the garden.

Trellis2

Trellis3

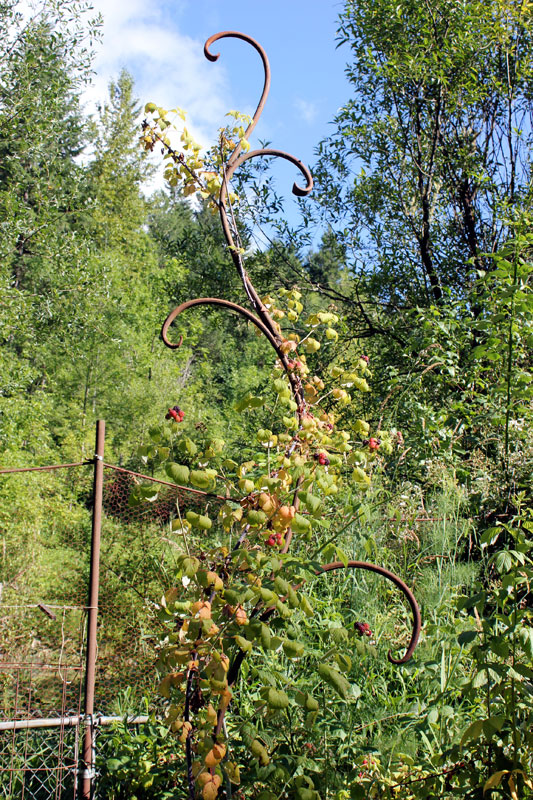
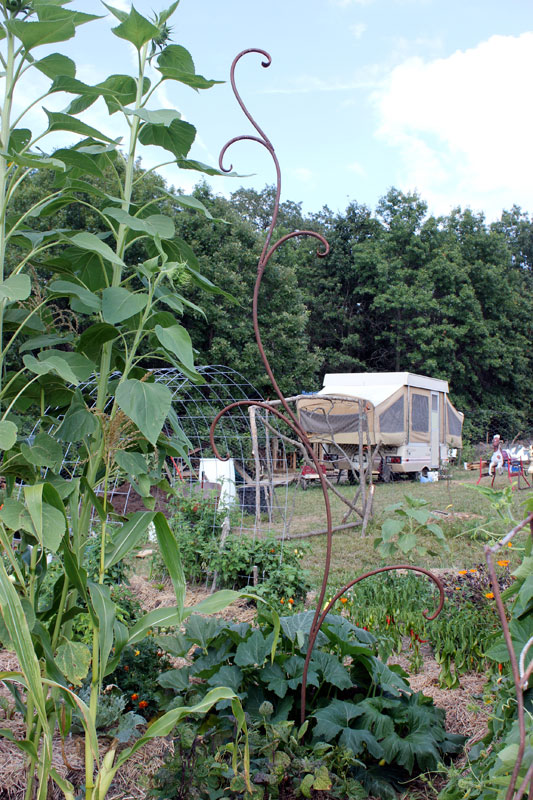
This trellis, crafted by my artist blacksmith husband, supported a black-capped raspberry in our Oregon garden. It came with us to Missouri, where it was intended for a lush and bountiful pole bean crop in Ella’s garden bed.  But pests had other plans and our bean crop has failed miserably.

Trellis6

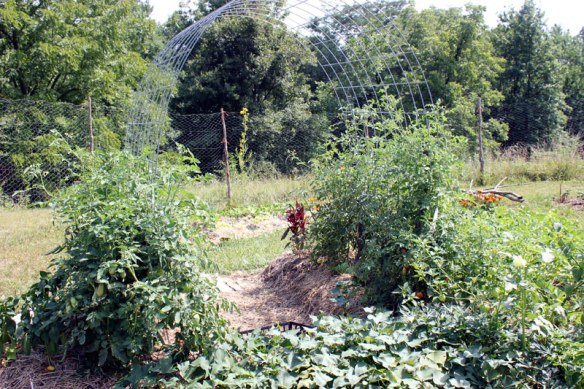
When I first learned about crafting an arched trellis out of cattle panels, I was hooked.  I imagined my indeterminate tomatoes climbing freely over the arch, creating a lovely shaded pathway below.

Trellis5

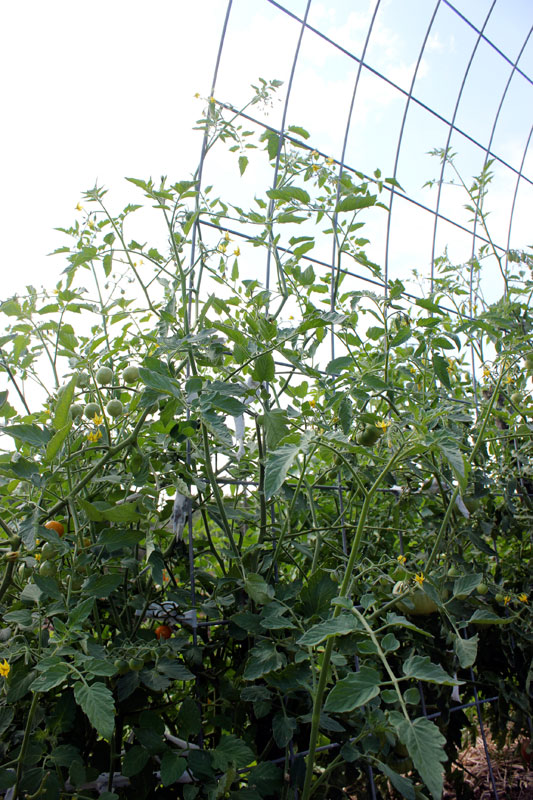
And while the arches are really quite cool, the tomatoes have not quite reached the towering heights I was anticipating. I chalk it up to a first year garden.  But, this trellis is really sturdy, easy to install, and will last for many years.

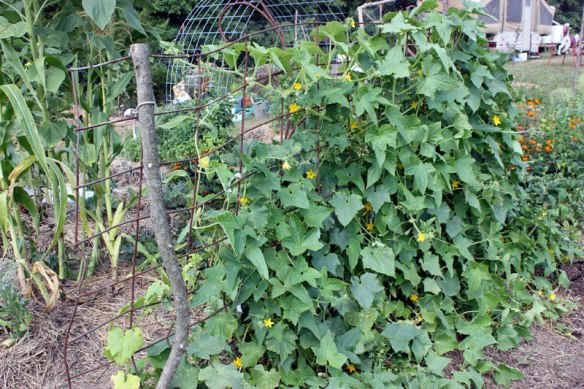
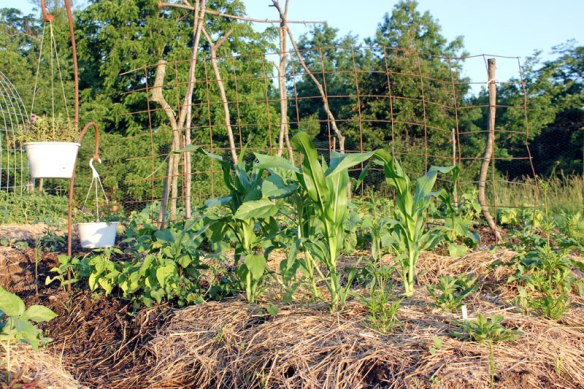
Next year, I believe I will use one of them for my cucumbers, which are bountiful and overtaking sections of the garden. Clearly, this trellis was not tall enough. (The cuke variety that is totally rocking out is Delikatesse, from Baker Creek Heirloom Seeds).

Trellis4

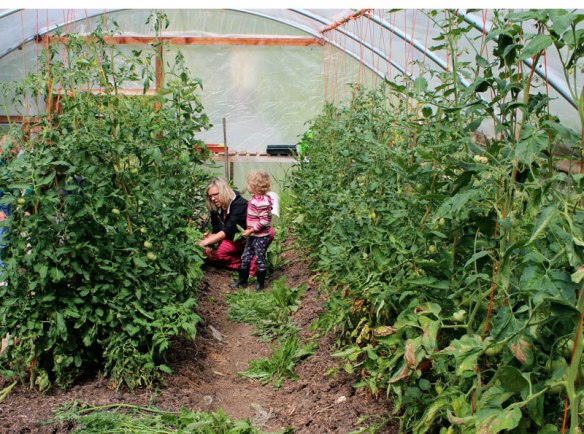
In Oregon, we had a wonderful 20 x 50 foot greenhouse that was such a joy in the rainy winter months.  Because we lived in a small valley with few hours of full sun exposure, it was very important that we planted our warm weather crops in a hoop house of some sort.  Working with the structural support of the greenhouse, we would tie string onto our tomato plants, and wind them up the taught string.  I pruned them heavily, so they’d put more energy into fruit production.  It was a labor-intensive method, but yielded great results.

Trellis7Trellis1
Trellises require a bit of extra effort at the start – building, creating, and guiding plants up the trellis, but the support they provide, and the texture they add to the garden are, in my mind, worth it.

How do you use trellises in your garden? 

Chime in here, or on the Homestead Honey Facebook page!

This post was shared on the Homestead Bloggers Network and From the Farm Blog Hop.

Piles

Some days I look around the land, and realize that Brian and I are Pile Managers.  I never really thought much about it before we started creating a new homestead from scratch, but the work of building and creating begins with piles. Piles1

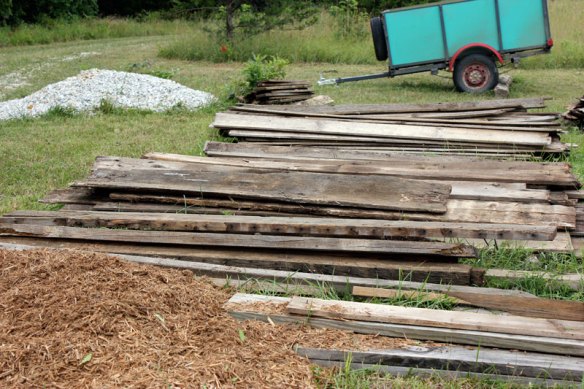
A pile of gravel leftover from the driveway we put in this winter.  A pile of wood chip/sawdust mulch that we’re spreading around the base of our fruit trees.  A pile of lumber from a century old barn and outbuildings that are being torn down, and whose wood will become the siding of our tiny home (and has already been integrated into the building of our chicken coop).

Piles2

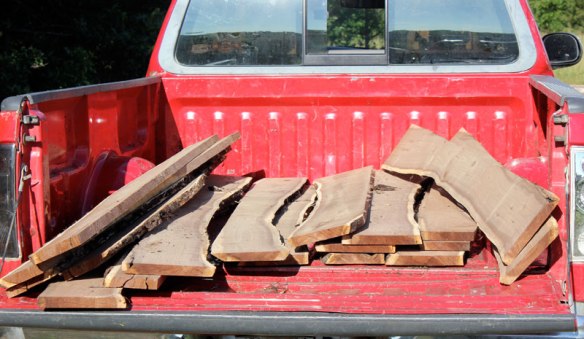
A pile of black walnut wood, ready to bring to a local Amish mill.  The previous owner had taken down several enormous black walnut trees, leaving tops in the forest.  Borrowing our neighbor’s log arch, Brian dragged these sections of trunk up hill, loaded them up, and brought them to the mill, where they were milled into…

Piles3

A pile of beautiful, high quality lumber.

Pond

Then there are the piles of materials for future projects, such as this pile of blue metal roofing for our someday composting toilet. Piles4

And of course, the many piles of organic material that went into the creation of my sheet mulched garden, such as this…

SheetMulch2

and this…Piles5

…which now, amazingly, look like this:

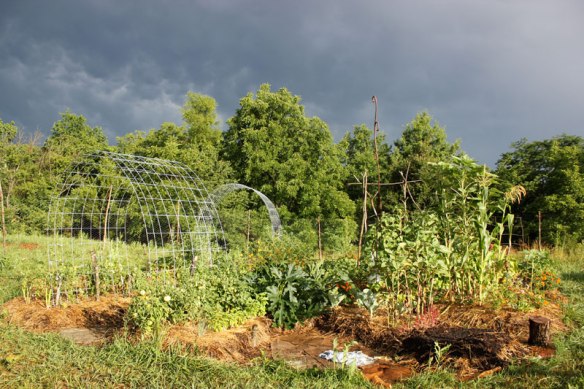
GardenLateJuly1

GardenLateJuly2

Indeed, we Pile Managers sure do create and move a whole bunch of piles!

This post was shared on the Homestead Bloggers Network, Mountain Woman Rendevous, and From the Farm Blog Hop.

In the Garden: Squashing Squash Bugs and Whining over Wilt

Zukes-and-Marigolds

Growing zucchini in Oregon took little more effort than tossing a few seeds over your shoulders and coming back in a month or two to harvest (and harvest, and harvest). Sure, a slug or two might eat your young plants, but if the zucchini plant outgrew the slugs, you were pretty much guaranteed more zucchini than you could possibly eat.

It’s not quite that easy here in Northeast Missouri. In fact, everything garden-wise is proving to be much less intuitive, and much more difficult than I imagined.  Pests can truly impede a home gardener’s ability to grow certain food crops.  Growing summer and winter squash is made challenging by the presence of squash bugs, squash vine borers, and cucumber beetles (which spread bacterial wilt disease) – and these are just the ones I have had personal experience with!  (This website has a great list of common squash pests and the damage they inflict.)

I planted five summer squash plants this season – one yellow crookneck, two yellow straightneck, and two zucchini.  The zucchini and yellow crookneck in particular have been incredibly healthy and prolific for the past month.  Trying to keep pests at bay, I dutifully checked the base of the stem every few days for signs of squash vine borers, and turned over leaves each day to kill any squash bug eggs I might find.

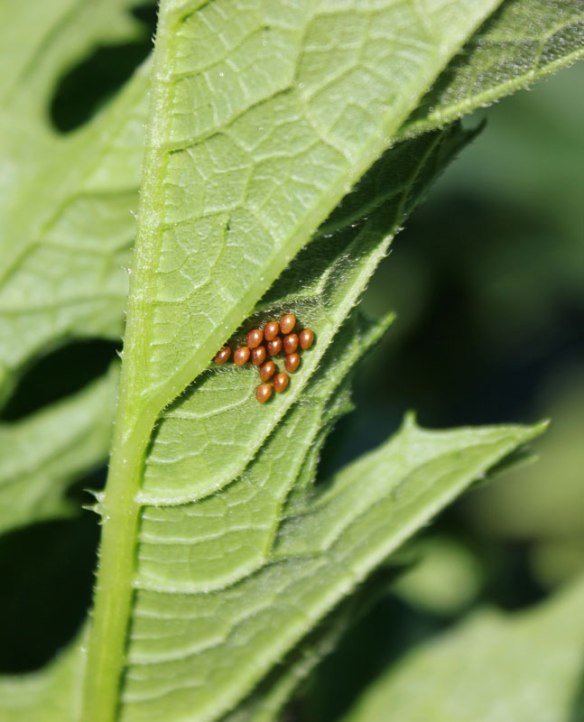
SquashBugEggs1 SquashBugEggs2

The copper colored eggs of the squash bug

In the process, I found a few adults and some nymphs, which I promptly squished.  Things seemed to be under control.

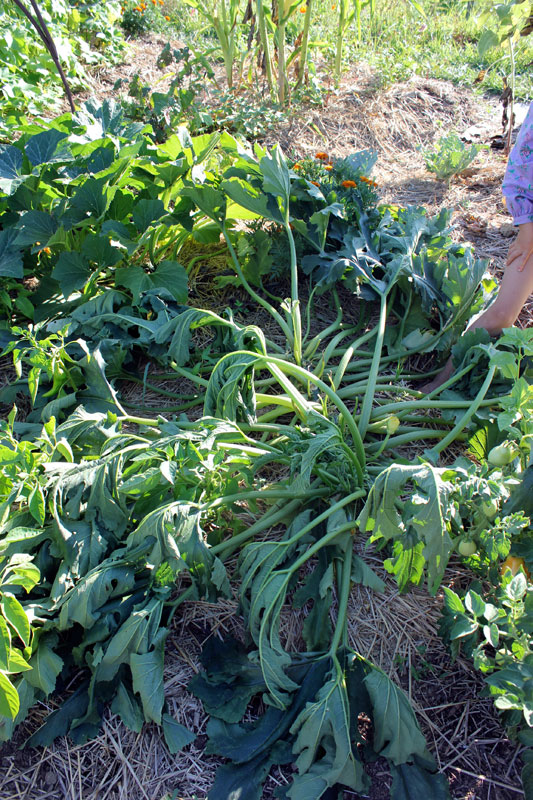
Then, one day, I came home in the late afternoon to find my zucchini plant looking like this:

DeadZucchini

AHHHHHHHH!

Since I was unable to find any trace of boring activity, my best guess is that my plant was infected with bacterial wilt disease, which is commonly spread by the cucumber beetle.  When the plant did not perk up after a day or two, I removed it from the garden. As you can see, the plant immediately adjacent has not (yet?) been affected.

I had a chance to talk with a Farmer’s Market grower this weekend, and he says that his best success comes from planting in succession.  I’m making a mental note to leave space for this next year. On a positive note, I now have a bit more garden real estate in which to plant fall crops!

How are things growing in your garden?  Share a link, tell a story, or just say hello in the comments below.  I’d love to hear from you!

This post shared with the Homestead Barn Hop, Homestead Bloggers Network, and The Home Acre Hop.

In the Garden: 7.1.2013

Garden-1

The combination of hot, humid days, and warmish nights have really helped my garden take off.  The photo above was taken exactly one month ago, and the photo below a week ago, and today the garden is even more lush and verdant.  In fact, this week we harvested our first zucchini, cucumbers, broccoli, and basil.  It is so wonderful to once again be able to cook a meal that we grew.

Garden-2 Garden-3

Ella’s garden (above), doing particularly well. I am convinced it is because she sings to her plants in such a sweet melodic voice.

Garden-4

The hot, humid Missouri weather has introduced me to a whole new aspect of gardening: pest management.  In Oregon, if you were vigilant about picking off slugs, and had a solid deer fence, your garden would fare well.  Here, I am combating cabbage moths, lace bugs, and cucumber beetles, and everybody tells me to watch out for the squash bugs and tomato hornworms.  While we slept, a large mammal (probably a skunk) crept through the fence and ravaged the garden, tearing into the sides almost every bed.  Oddly enough, not a single plant or fruit was eaten, which is why I suspect skunk over raccoon. I imagine the skunk was hunting for grubs, of which we have plenty. You can see the damage in the photo above.

Pests aside, the garden gives me such pleasure, and it is a joy to walk it each morning with Ella and Everett at my side.  Ev scouts out new green tomatoes and hunts for the last remaining ripe strawberries, while Ella hand-pollinates zucchini and creates flower bouquets.

What is growing in your garden?


A Sneak Peek

Well, here we are, back from cake land, and once again firmly rooted in the reality of building a homestead.  Unfortunately, we have been rained out of our big moving day, which was supposed to be today. We will wait at the cozy town house until things dry up enough to move heavy furniture across wet ground.  While I’ve been sharing endless photos of cakes and decadent icing, we’ve actually been hard at work creating a rustic camping situation that will be comfortable enough to live with for three or four more months, or until we finish the house.

So here is a little sneak peek of our soon-to-be home!

Garden3

The garden is really coming along.  I still have peppers, basil, and some okra and onions to plant, but the main push to build a sheet mulch garden is over, and now I’m enjoying planting, sowing, and watering. OutdoorKitchen1


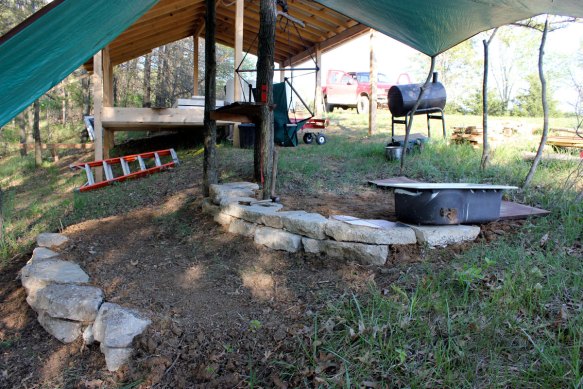
Brian has been shaping and building a beautiful outdoor kitchen, creating level spaces with urbanite and earth moving, and using some lovely black walnut wood that we had milled up in Oregon to create counters and cook tops.OutdoorKitchen2


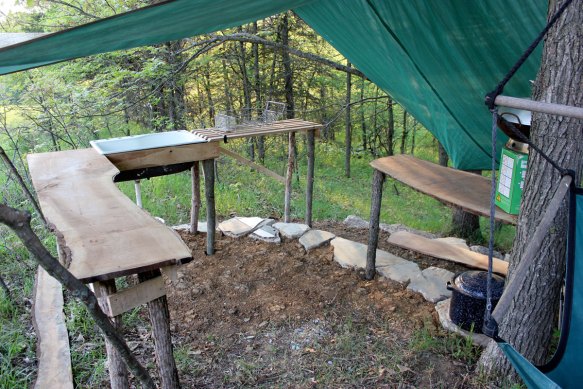
This photo is a week or two old, and shelving and running water has since been added, but you can see the sink, counter space to the left, and the cookspace to the right.  The lower level will be the “pantry.”NewSofa

Moving slightly east to the living room!  That orange sofa was a total college move-out day score!  Free on the side of the road for the taking.  At first I gave Brian a “what are you, crazy?” sort of look, but I have to admit that it is comfortable and so useful for chilling out under the blue roof of the future house.

SunOven

The Sun Oven at work!  We will have a two burner Coleman white gas stove, a rocket stove, and this Sun Oven to cook with.  I hope for lots of sunny days, as the Sun Oven is SO cool.

TentHome

Tent, sweet Tent.  Our neighbors lent us this enormous tent in which to sleep and play.  The kids have loved spending time in there with their dolls and trucks; it’s relatively tick-free, cool, and spacious.

WaterHarvesting

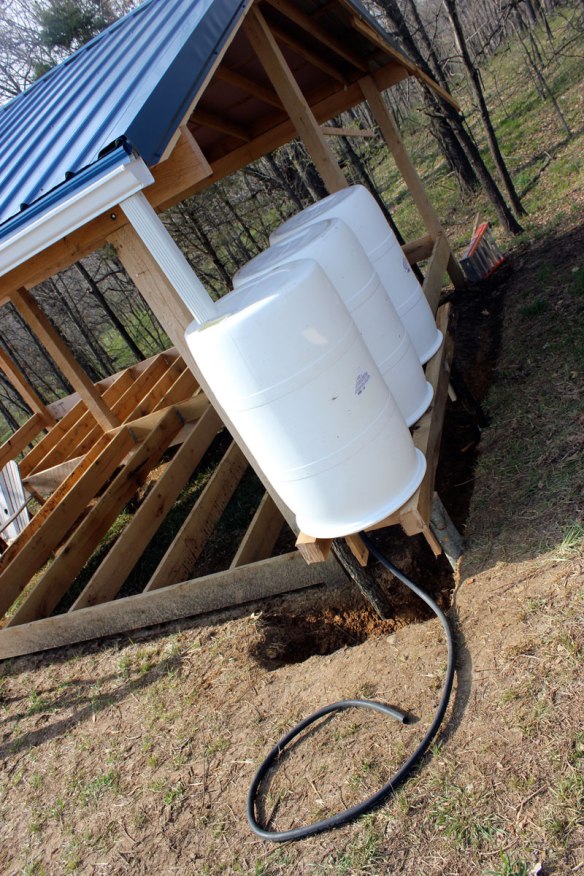
And maybe the most important element of our camping situation: Water.  With this rain, we now have five 50 gallon barrels of water full to the tip top (and overflowing).  The barrels we purchased from Pepsi for $10 each.  They smell like Mountain Dew.  To filter, we will be using a Berkey Water Filter.

I look forward to sharing more in-depth information about each of these elements as we move to the land and get more intimate with these systems.  I know it will be a huge adjustment, but I’m really growing more and more excited to finally live on our land.


Planting down memory lane

A few days before we left our Oregon homestead, my good friend and neighbor helped me pack my garden. Yes, I know it’s crazy, but it felt hugely important to bring to our Missouri home some small percentage of the hundreds of plants that I had come to know and love over years.  So we spent several hours choosing, pruning, labeling, digging, and packing flowering perennials, herbs, bulbs, and fruit bushes into black garbage bags nestled inside of enormous cardboard boxes.  Into the moving truck, and across the country my plants traveled, and when they arrived in Missouri, I hastily heeled them into a makeshift bed of topsoil, covered them with leaves, draped chicken wire over the entire thing, and hoped for the best.

In March I checked on the bed to see if there were any signs of life, and sure enough, the Columbines were putting out lush green growth. I felt an urgency to put the plants in the ground, to get them established before they put all their energy into upward growth. On a gusty day, Brian and I worked quickly to dig up sod, shake off the topsoil, loosen the hard clay below, and add horse manure.  It was hard work, and thankfully our good friends who were visiting were willing to chip in and help.  There were moments that I lifted out a “plant” and saw nothing more than a dead stick with a bright pink label.  But I put it all in the ground, thinking that you never know when a plant will surprise you!

PerennialGarden2 PerennialGarden5

Over the past few weeks, I’ve been eagerly watching the bed for new signs of growth, and every time I see a tiny leaf push through the soil, it is a joyous gift.  Yesterday, I was on my hands and knees, gasping with excitement over the fact that my favorite mint – which I dug up from the Echo Hollow creek-side, and interestingly, had been first planted by my Missouri neighbor Sarah – was indeed alive!  It struck me that these plants are so important to me because they represent so much more than beauty and culinary delight; they are like a scrapbook of my past, holding the memories of important friendships, events, and places.

For instance, the four years that I worked at a wholesale plant nursery, way back in 2000-2004.  So many discarded, overgrown plants came home with me those years. Into the garden they went, and as I added more and more plants to my stash, Brian obligingly dug and sculpted more garden space. Those were tumultuous years of our relationship, yet there was something about the garden work that we did together that assured us that, like the plants, we would grow together. Some of the plants from that nursery, a perennial primrose for instance, are still alive and now at home with me in Missouri.

PerennialGarden1

Or flowers from the garden on the land that I was married.  I worked in that garden for a summer, talking with my friend, the owner as we weeded together.  I remember one day I was confiding with her about my relationship with Brian – I wasn’t quite sure where it was all going.  She assured me that we were meant to be together, and when we were ready to be married, it would be on her land.  Her Cut-Leaf Rudbeckia came home with me one day that summer, and is now growing more happily than I’ve ever seen it.

Or the way that my Oregon garden acted as a backdrop for our lives.  We’d step out the door and check on new growth, or steep some sun tea, or warm ourselves, or play with goats in that garden.  Some people have a stately tree under which they snap their family portraits; I had that garden.

PerennialGarden3 PerennialGarden4 PerennialGarden6

Some of that warmth, that connection, those memories that I associate with plants and gardens is here with me, in our new home.  And so my plants and I continue our journey together, sending down new roots, and experiencing new growth.

PerennialGarden7

* This post was shared at Natural Living Monday, Homestead Barn Hop,The Backyard Farming Connection, The HomeAcre Hop, and Homestead Bloggers Network.

Planting fruit trees

The past three weeks on our homestead have been all about fruit trees.  When I placed my orders in February, perhaps I was a wee bit overzealous, and I ordered a lot of trees (18 to be exact), fruiting bushes (a modest 6) and raspberries (only 12!)  Planting fruit trees is like a celebration of finally owning our little piece of land and an investment in the future, so the more the merrier, right?

Well, sort of right. The thing about fruit trees is that you really need to take care siting and planting them.  All winter long I’ve been placing markers at potential sites, reading books about orchard management (The Holistic Orchard is my favorite), and drooling over fruit tree catalogs (I ordered from One Green World and St. Lawrence Nurseries). Yet somehow, with all that dreaming and planning, I kind of neglected to think about how much time it takes to properly prepare a hole for planting.  Thank goodness for my strong Homestead Hubby and a lot of great tips from St. Lawrence Nurseries’ planting guide. If you are getting ready to put trees in the ground, I would highly recommend reading their guide before you begin.

Here are some highlights of our planting experience, including some ways that we made planting flow more easily and quickly. Fruittree1

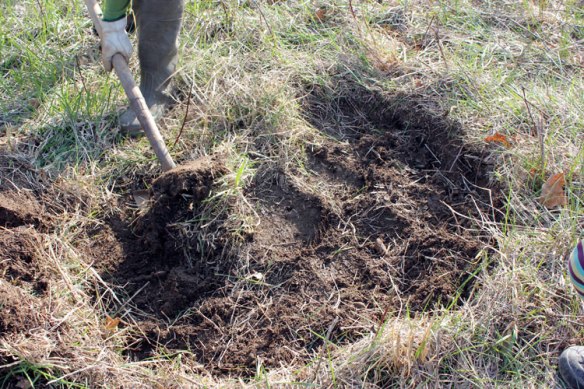
Brian prepares the site by first scraping and removing the sod in a 2-3 foot diameter circle.Fruittree2

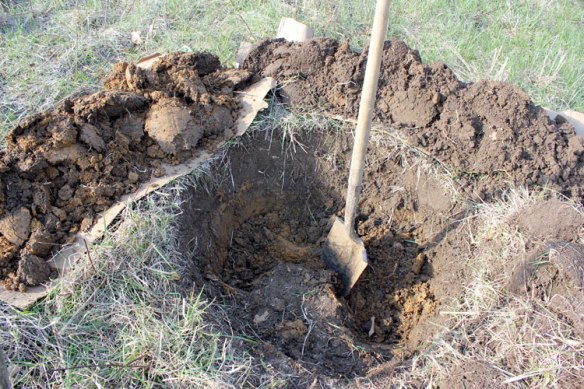
Digging deep!  Topsoil is moved to one pile, and subsoil to another.  In our holes, the topsoil was rich and brown, while the subsoil was a heavy reddish clay.

We found it easiest to lay cardboard down next to the hole and place the soil upon the cardboard, making it really easy to lift and shake the last bits of dirt into the hole.Fruittree3

Three piles: sod, subsoil and topsoil.  After digging to a depth of 1 1/2 – 2ft, we roughed up the bottoms and sides of the hole, which makes it easier for roots to penetrate the heavy clay. Fruittree4


Trees and bushes were kept heeled into our big compost pile until we were ready to plant.Fruittree5

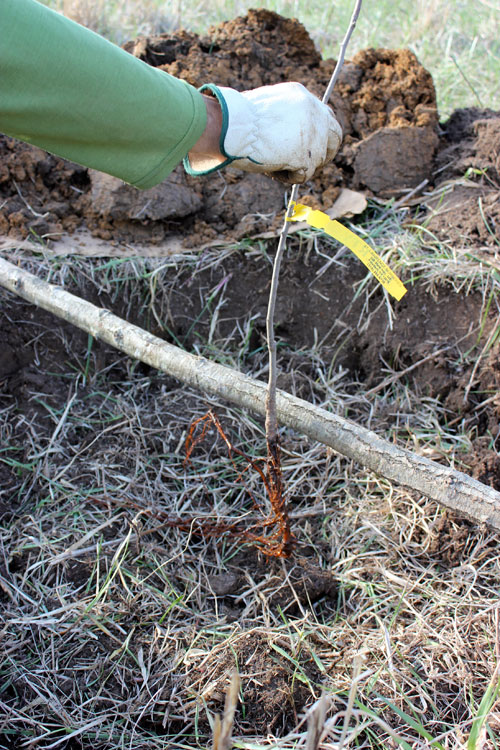
We used a long stick across the hole so it was easy to determine the proper level at which to plant the tree.  The contents of the hole go back in the opposite order: sod first, topsoil around the roots of the tree, and subsoil last.Fruittree6

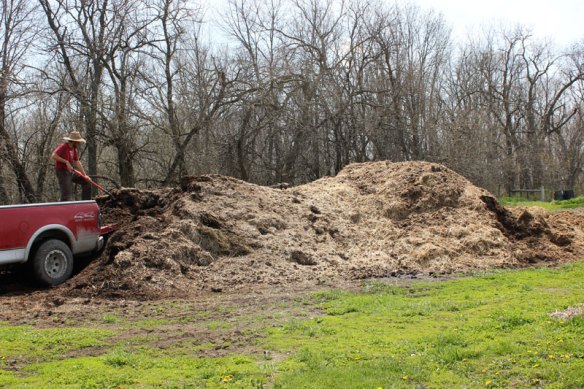
After planting, I heaped a large wheelbarrow load of composted horse manure in a bowl shape around the tree. Then the tree gets a nice big drink of water. Fruittree7

Voila! The beginnings of an orchard!